Laser Cutting Acrylic to Make a Pickguard
Our first adventure with acrylic wasn't too impressive, but we did end with a really cool pickguard for our replica of Eddie's guitar from Stranger Things 4.
-Sean and Connor Miller 7/13/2022
We built our Bigtime Basement Build CNC for one purpose - make a guitar. Originally it was an acoustic guitar. We then recognized it's easier to make an electric - and then - Stranger Things 4 came out. That sealed it. We are now targeting Eddie's guitar that he rocked out on Metallic with.
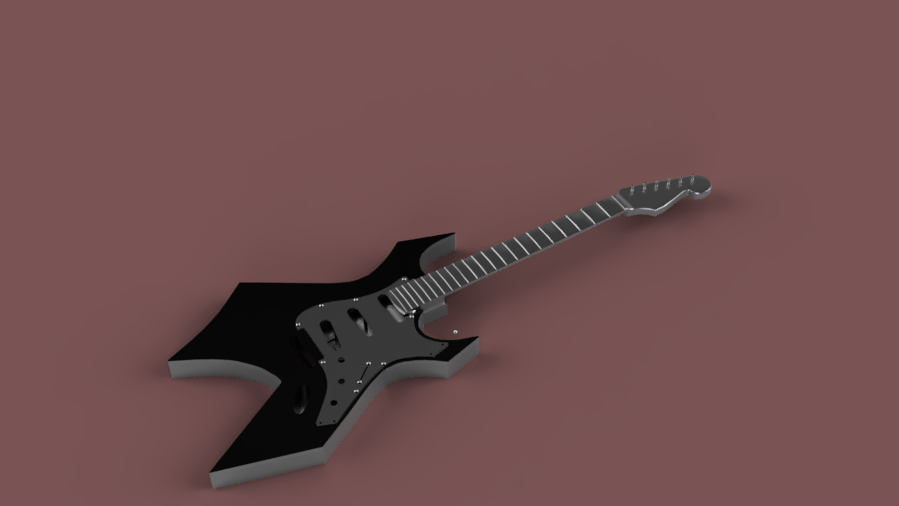
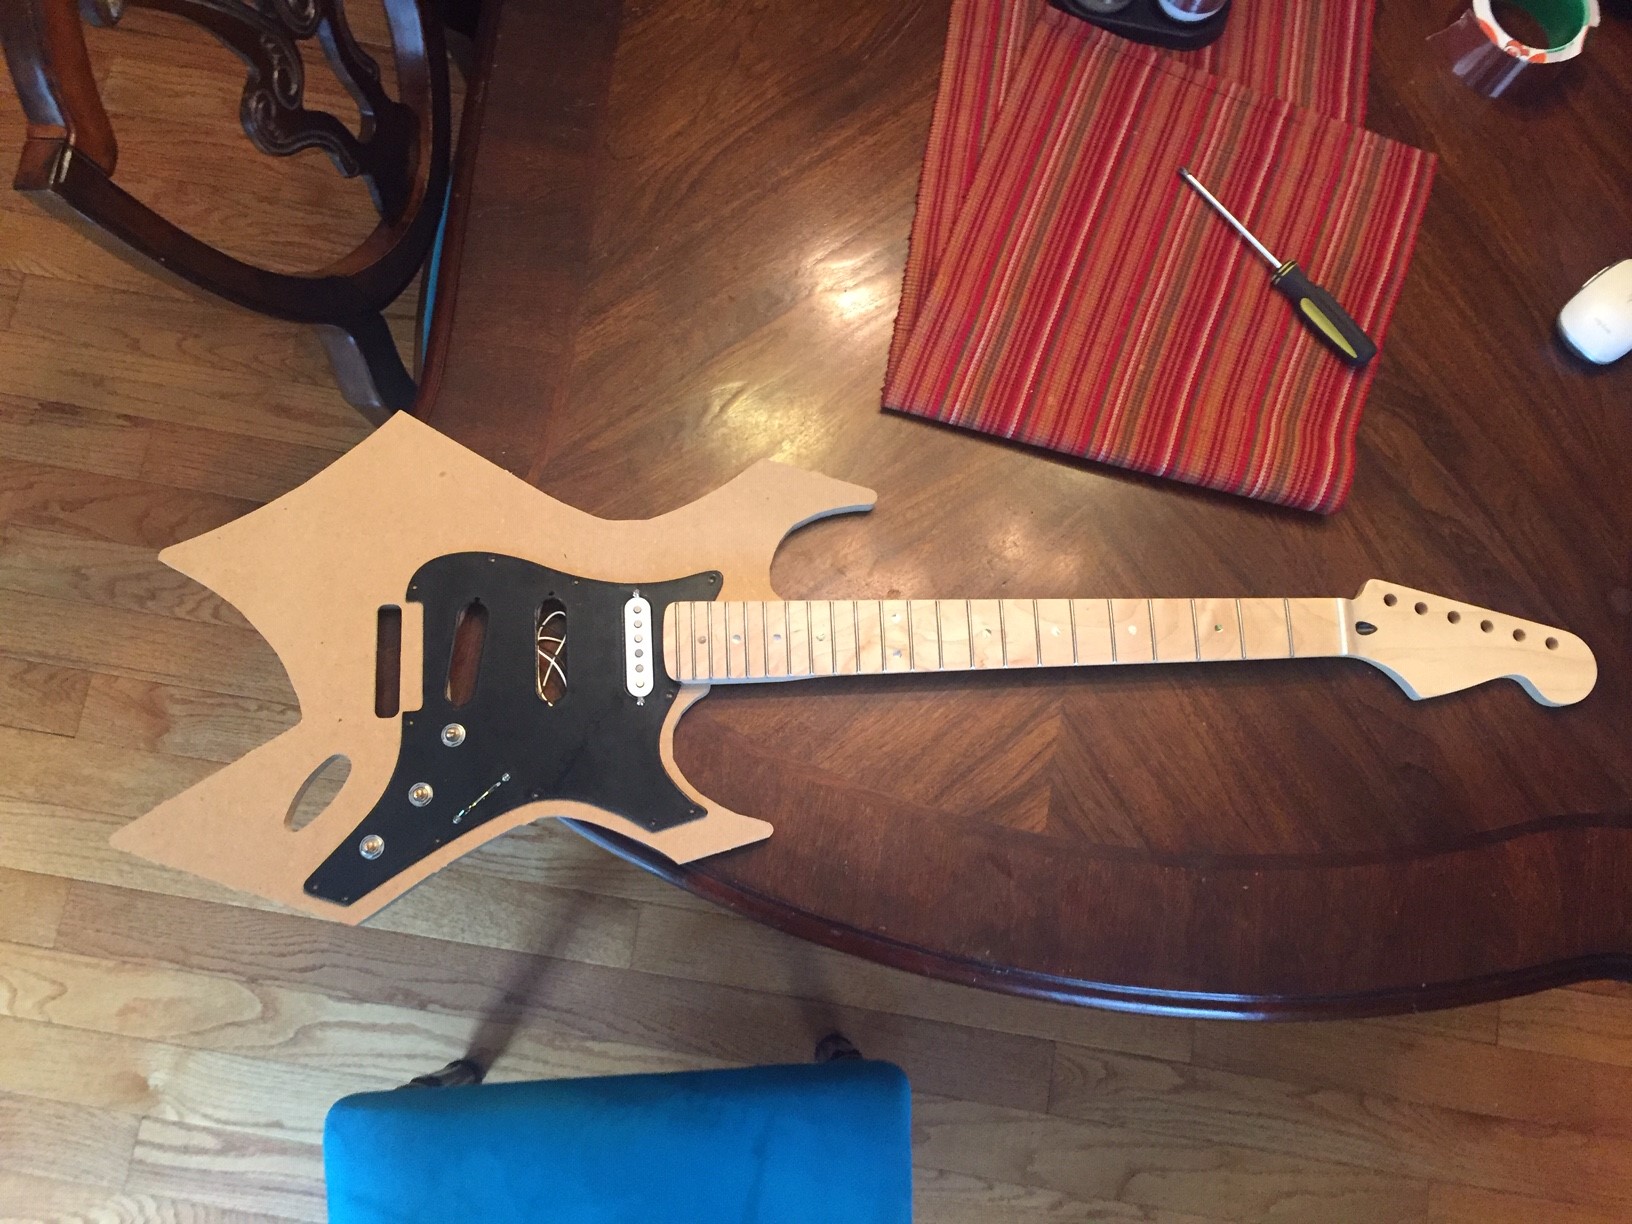
So, we found a model of a Fender Stratocaster. Connor found a picture of the guitar. With Fusion 360, Connor was able to sketch out the shape and we fused the critical geometry of the pickups and neck landing of the Stratocaster with the body shape of Eddie's guitar. We didn't have a great pickguard photo for reference, so we customized our own.

This was the first time we laser'd acrylic. I must say, it was a comedy of errors. I was so eager to get it going, I didn't even pay attention to the speed setting. So, we did something like 6 passes before we gave up. We were barely etching it.
We then slowed it down to see if we could cut in one pass, but it had a tendency to melt and fuse back together and we'd break it trying to get it apart. It took 4 attempts, but we finally got one pictured above. The edges were a jagged micro melted mess and the sheen had heat effected zones around the laser cuts.
The good news - sanding and then polishing with rubbing compound took out the ugly. It took great care because the prior attempts proved that the acrylic became embrittled from the heat.
If I had any more material, I'd try just milling it out to compare the speed and quality overall. Regardless, we are happy with it and are now ready to carve the body.
For what it is worth, with a 10W (two 5W laser design), the settings were 100mm/min at 100% power.
Researching after we did this we found the reason for the jagged edge is due to the high air flow our laser provides. We need to add a Potentiometer to the fan so we can dial it down to just enough to blow out the fume flame and create a high gloss. Here is an exerpt:
A gentle stream of air or nitrogen will blow the vapour away from the cutting area, to prevent the vapours igniting. This gentle stream of air also helps solidify the remaining liquid along the cut line; this will help create a glossy, smooth flame-polished finish on the cutting surface. But this is a double edged sword, if the stream of air is too powerful, the cutting edge will be disturbed while in the solidification phase and create a frosted or wavy cutting edge. So having a variable pressure regulator on the air assist pump is a must.
EXPERIMENT
To further dial in 3mm glossy Acrylic, we ran an experiment. We lasered lines at max power starting at 1000mm/min and dropping down incrementally in speed. We gave it 10 passes. The intent was to find the power combo that gave the best overall quality.
We found 10 passes at 700 mm/min gave full penetration with the least side burn. We may have been able to do less passes, but didn't want to stop the test.
Here is the GCODE we used:
(laser)
$32=1
G90 G94
G17
G21

(Pickguard)
G54
G0 S1000 M4
G0 X20 Y100
G1 X100 Y100 F1000
G1 X100 Y80 F1000
G1 X20 Y80 F900
G1 X20 Y70 F900
G1 X100 Y70 F800
G1 X100 Y60 F800
G1 X20 Y60 F700
G1 X20 Y50 F700
G1 X100 Y50 F600
G1 X100 Y40 F600
G1 X20 Y40 F500
G1 X20 Y30 F500
G1 X100 Y30 F400
G1 X100 Y20 F400
G1 X20 Y20 F300
G1 X20 Y10 F300
G1 X100 Y10 F200
G1 S0
G0 X20 Y10
M30